Mosquitto with TLS using an AWS Broker
This post talks you through the steps of setting up an Mosquitto broker hosted on AWS then connecting to it with a Transport Layer Security (TLS) connection.
I am using just the standard Amazon Machine Image (AMI)
I followed the steps in https://docs.aws.amazon.com/AWSEC2/latest/UserGuide/putty.html to get acces to the image via Putty and via WinSCP. I edited the Security Group inbound rules to allow All ICMP (for debugging) and TCP ports 1883-1886 for mosquitto.
The AMI image doesnt have the apt package manager, it uses YUM instead. In order to install mosquitto you also need to install the libsockets library.
1
2
3
4
5
wget http://download.opensuse.org/repositories/home:/oojah:/mqtt/CentOS_CentOS-7/home:oojah:mqtt.repo -O /etc/yum.repos.d/mqtt.repo
wget https://dl.fedoraproject.org/pub/epel/epel-release-latest-7.noarch.rpm -P /tmp
sudo yum install -y /tmp/epel-release-latest-7.noarch.rpm
sudo yum install libwebsockets
sudo yum install mosquitto mosquitto-clients
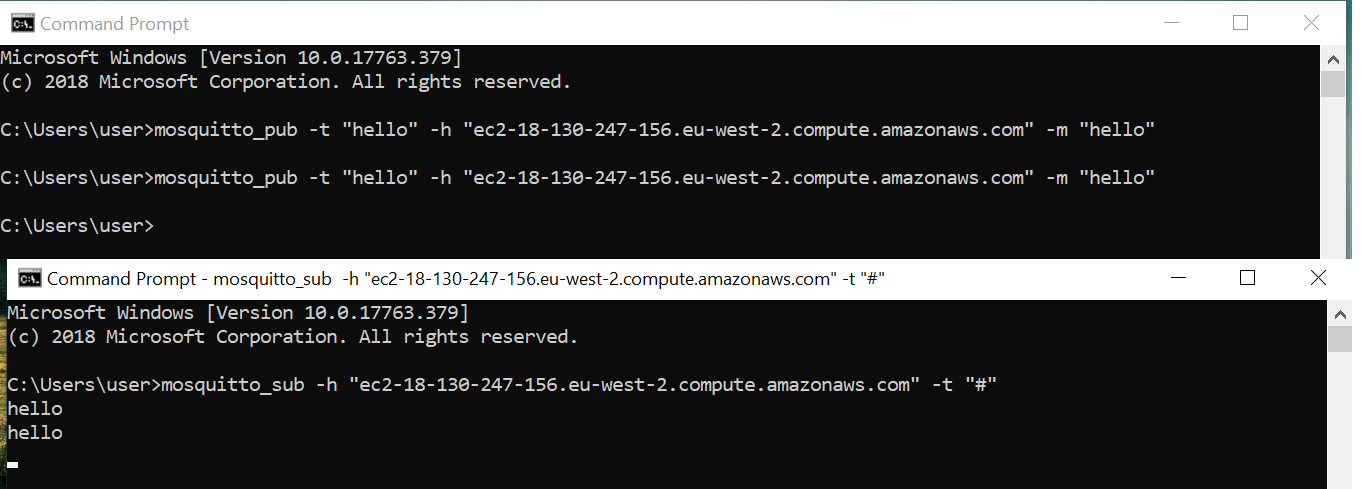
Once the broker is running on AWS, its worth trying to connect to it without TLS to verify that the ports are open.
The next step is to create the keys & certificates for TLS authentication.
Im using OpenSSL in a Ubuntu VM. We need to create a Certification Authority (CA) certificate and then create some keys for the mqtt broker. Then we will create a Certificate Signing Request (CSR) which we will send to the CA to sign. Once the CA has signed the server keys and created a certificate, we can copy them over to the AWS machine and tweak mosquitto to use these credentials.
Create CA Certificate
1
openssl req -new -x509 -days 365 -extensions v3_ca -keyout ca.key -out ca.crt
Enter whatever information you want for the distinguishable name. I set the Common Name to “mqtt ca”. This will create a “ca.crt” which is the certificate and a “ca.key” which is the private key.
Create Server Key & Certificate
Create a key for the server (mqtt broker). If you create a server key with encryption, you will have to enter the key passphrase everytime you start the broker.
With Encryption
1
openssl genrsa -des3 -out server.key 2048
Without Encryption
openssl genrsa -out server.key 2048
Now create a Certificate Signing Request (CSR). The most important step here is to use the server hostname as the Common Name, otherwise it wont work.
openssl req -out server.csr -key server.key
So my common name was “ec2-18-130-247-156.eu-west-2.compute.amazonaws.com”
Finally get the CA to sign the CSR
1
openssl x509 -req -in server.csr -CA ca.crt -CAkey ca.key -CAcreateserial -out server.crt -days 365
This will create a server.crt which is the certificate we can use on the AWS broker. Use WinSCP to copy over the ca.crt, server.key and server.crt to the AWS machine.
You can use the following command to verify that a certificate was signed by a CA certificate.
1
openssl verify -CAfile ca.crt server.crt
Once the files are on the AWS server, copy the default mosquitto configuration to the working directory
1
cp /etc/mosquitto/mosquitto.conf ~/aws_mosquitto.conf
At the bottom of the file, add the following items and make sure they point to the correct location
1
2
3
4
cafile /home/ec2-user/ca.crt
keyfile /home/ec2-user/server.key
certfile /home/ec2-user/server.crt
tls_version tlsv1
Start up the mosquitto broker with the following:
mosquitto -v -c aws_mosquitto.conf
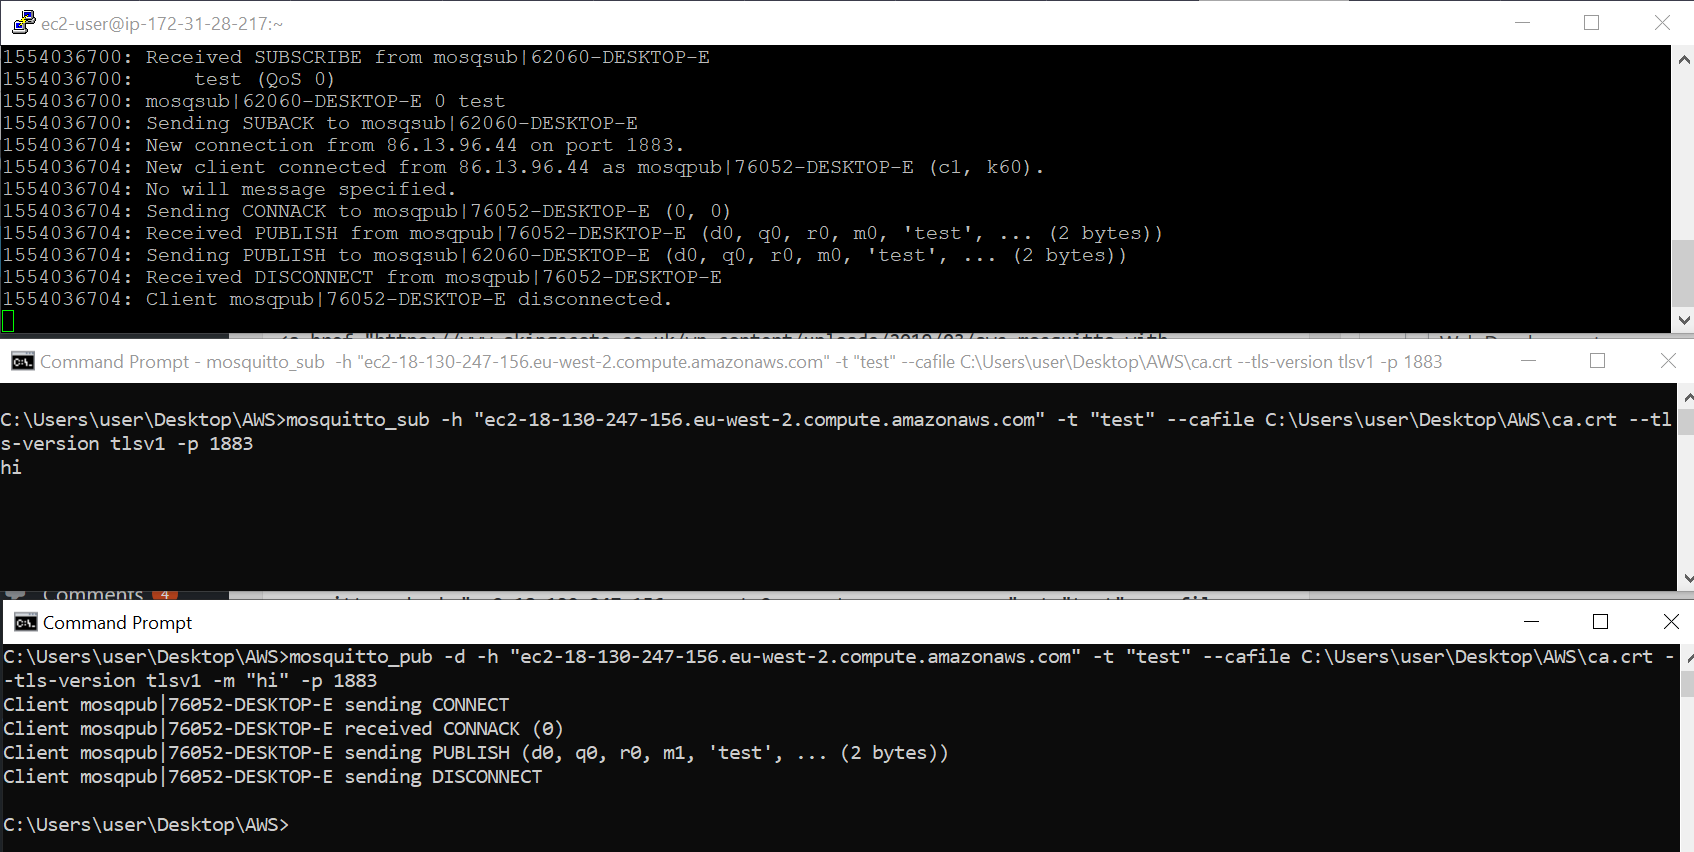
On your client machine, you should be able to connect to the broker. I found two things i had to specify in order to get it working. You must explicitly specify the port number (even though im just using the default 1883) and also specify that you are using TLSv1 as by default mosquitto clients use a different version.
1
2
mosquitto_sub -h "ec2-18-130-247-156.eu-west-2.compute.amazonaws.com" -t "test" --cafile C:\Users\user\Desktop\AWS\ca.crt --tls-version tlsv1 -p 1883
mosquitto_pub -h "ec2-18-130-247-156.eu-west-2.compute.
And there we go! Thats a subscriber and publisher setup using TLS against a broker hosted on AWS.
You can also create some client keys and certificates and as long as they are signed by the same CA certificate, you can use them in a client connection.
Generate Client Keys
openssl genrsa -des3 -out client.key 2048
Create CSR - make sure the information is not identical to the server (broker) certificate. Otherwise MQTT get confused and its difficult to debug. I kept the common name the same though (hostname).
openssl req -out client.csr -key client.key -new
Request the Client Certificate
openssl x509 -req -in client.csr -CA ca.crt -CAkey ca.key -CAcreateserial -out client.crt -days 365
You can always use the verification command to check that the certificate was signed by the right CA record. Now on the client side you can use the –key and –cert arguments to reference the client certificates. You will have to enter a passphrase if you created the keys with encryption.
1
2
mosquitto_sub -h "ec2-18-130-247-156.eu-west-2.compute.amazonaws.com" -t "test" --tls-version tlsv1 -p 1883 --key C:\Users\user\Desktop\AWS\client.key --cert C:\Users\user\Desktop\AWS\client.crt --cafile C:\Users\user\Desktop\AWS\ca.crt
mosquitto_pub -d -h "ec2-18-130-247-156.eu-west-2.compute.amazonaws.com" -t "test" --tls-version tlsv1 -m "hi" -p 1883 --key C:\Users\user\Desktop\AWS\client.key --cert C:\Users\user\Desktop\AWS\client.crt --cafile C:\Users\user\Desktop\AWS\ca.crt


