MicroK8s OpenID Connect - Azure Identity Provider
This post details the implementation steps to integrate MicroK8s Kube API Server with Azure in order to use Azure Active Directory (AAD) identities within your cluster.
The OAuth 2.0 framework supports several flows for retrieving an Access Token. Which flow is suitable depends on your specific architecture and scenario. Some common flows are: Client Credential Flows - Typically used in automated mechanisms (machine-to-machine). Authorisation Code Grant / Code Flow - Arguably the most common flow, used by web apps, an authorisation code is exchanged for a token. Resource Owner Password Flow - Username & Password are provided to retrieve access token.
The chosen OAuth implementation method (flow) will dictate which tokens are of value
There are three tokens (JWT) of interest:
- ID Token - used to provide user profile information to a client
- Access Token - provided when a user successfully authenticates passes authorisation checks. The token is valid only for a specific scope (variable - typically time and resource constrained) and is used to perform actions allowed by the scope. Possession of this token grants resource access.
- Refresh Token - used to automatically rollover and retrieve a new access token. Allows for a user to potentially be indefinately authenticated.
OpenID Connect extends OAuth 2.0 to allow for profile information to be asserted and returned in an ID Token.
Azure Setup
You must have an Azure Active Directory setup. Create a couple of users, ensure that MFA is disabled and that you can log in as those users.
We will need to use the Resource Owner Password flow because we are not going to implement a fancy authetnication mechanism. We do not care about a Redirect URI as we will just request the token directly. This is not ideal in production where you would want a more robust, secure and versatile solution (something that works with MFA for example). Microsoft have their own documentation on this setup and recommand to not use this mechansism - but it is absolutely fine to teach the concepts without much development overhead.
Firstly, go to App Registrations and create an app called my-microk8s. Leave the supported account type alone and leave the redirect URI empty. Click registter and go to Certificates & secrets in the blade. Click New Client Secret, enter a description (something like my-microk8s-secret) and save the value somewhere (password manager). You wont see this value again.
Note down the tenant ID by going to the tenant, go to the registered application (my-microk8s) and note Directory (tenant) ID.
Go to the Token Configuration blade, add in an optional clam. Add a Groups claim and select All Groups.
Go to API Permissions, click Grant admin consent for the User.Read permission.
MicroK8s Setup
On a modern Linux (Ubuntu) distribution, Install MicroK8s with snap with the following:
1
sudo snap install microk8s --classic
Next, we will need to configure the MicroK8s API to use the KeycloakOIDC provider. Edit /var/snap/microk8s/current/args/kube-apiserver and append the following:
1
2
3
4
5
6
--oidc-issuer-url=https://login.microsoftonline.com/xxxxxxxx-xxxx-xxxx-xxxx-xxxxxxxxxxxx/v2.0
--oidc-client-id=xxxxxxxx-xxxx-xxxx-xxxx-xxxxxxxxxxxx
--oidc-username-claim=upn
--oidc-username-prefix="oidc:"
--oidc-groups-claim=groups
--oidc-groups-prefix="oidc:"
Where the blank in oidc-issuer-url is your Tenant ID and oidc-client-id is your application client id. upn means User Principal Name which is the User ID. These are standard OpenID configuration of the Kubernetes API and not unique to MicroK8s.
After making the changes, restart MicroK8s
1
2
sudo microk8s stop
sudo microk8s start
Token Request
In more sophisticated deployments, typically a web browser will open up and connect to an endpoint where the user can enter authentication information. You could use proxy services such as keycloak gatekeeper (now deprecated :( ) or implement behaviour similar to the Azure Command Line Interface az login command.
However, for now ive developed a noddy script which will do the job.
1
2
3
4
5
6
7
8
9
10
11
12
13
14
15
16
17
18
19
20
21
22
23
24
25
26
27
28
29
30
31
32
33
34
35
36
37
38
39
40
41
42
43
44
45
46
47
48
49
50
51
52
53
54
55
56
57
#!/bin/bash

# https://gist.github.com/thomasdarimont/46358bc8167fce059d83a1ebdb92b0e7
_decode_base64_url() {
  local len=$((${#1} % 4))
  local result="$1"
  if [ $len -eq 2 ]; then result="$1"'=='
  elif [ $len -eq 3 ]; then result="$1"'='
  fi
  echo "$result" | tr '_-' '/+' | base64 -d
}

# $1 => JWT to decode
# $2 => either 1 for header or 2 for body (default is 2)
decode_jwt() { _decode_base64_url $(echo -n $1 | cut -d "." -f ${2:-2}) | jq .; }

TENANT="xxxxxxxx-xxxx-xxxx-xxxx-xxxxxxxxxxxx"
CLIENT_ID="xxxxxxxx-xxxx-xxxx-xxxx-xxxxxxxxxxxx"
CLIENT_SECRET="xxxxxxxxxxxxxxxxxxxxxxxxxxxxxxxxxx"
# user credentials in active directory
USER="test1@xxxxxxxxx.onmicrosoft.com"
PASSWORD="xxxxxxxx"

URL="https://login.microsoftonline.com/${TENANT}/oauth2/v2.0/token"
DATA="client_id=${CLIENT_ID}\
&scope=user.read%20openid%20profile%20offline_access\
&username=${USER}\
&client_secret=${CLIENT_SECRET}\
&password=${PASSWORD}\
&grant_type=password"

RESPONSE=$(curl --data "${DATA}" "${URL}")
echo "${RESPONSE}" | python -m json.tool

REFRESH_TOKEN=$(echo "${RESPONSE}" | jq -r .refresh_token)
ID_TOKEN=$(echo "${RESPONSE}" | jq -r .id_token)
ACCESS_TOKEN=$(echo "${RESPONSE}" | jq -r .access_token)
SCOPE=$(echo "${RESPONSE}" | jq -r .scope)

decode_jwt $ACCESS_TOKEN

echo "REFRESH_TOKEN is ${REFRESH_TOKEN}"
echo "ID_TOKEN is ${ID_TOKEN}"
echo "ACCESS_TOKEN is ${ACCESS_TOKEN}"
echo "SCOPE is ${SCOPE}"

sudo microk8s.kubectl config set-context test --cluster=microk8s-cluster --user="${USER}" --namespace=default
sudo microk8s.kubectl config use-context test
# Update Config
sudo microk8s.kubectl config set-credentials "${USER}" --auth-provider=oidc \
--auth-provider-arg=idp-issuer-url="${URL}" \
--auth-provider-arg=client-id="${CLIENT_ID}" \
--auth-provider-arg=client-secret="${CLIENT_SECRET}" \
--auth-provider-arg=refresh-token="${REFRESH_TOKEN}" \
--auth-provider-arg=id-token="${ID_TOKEN}"

sudo microk8s.kubectl get pods
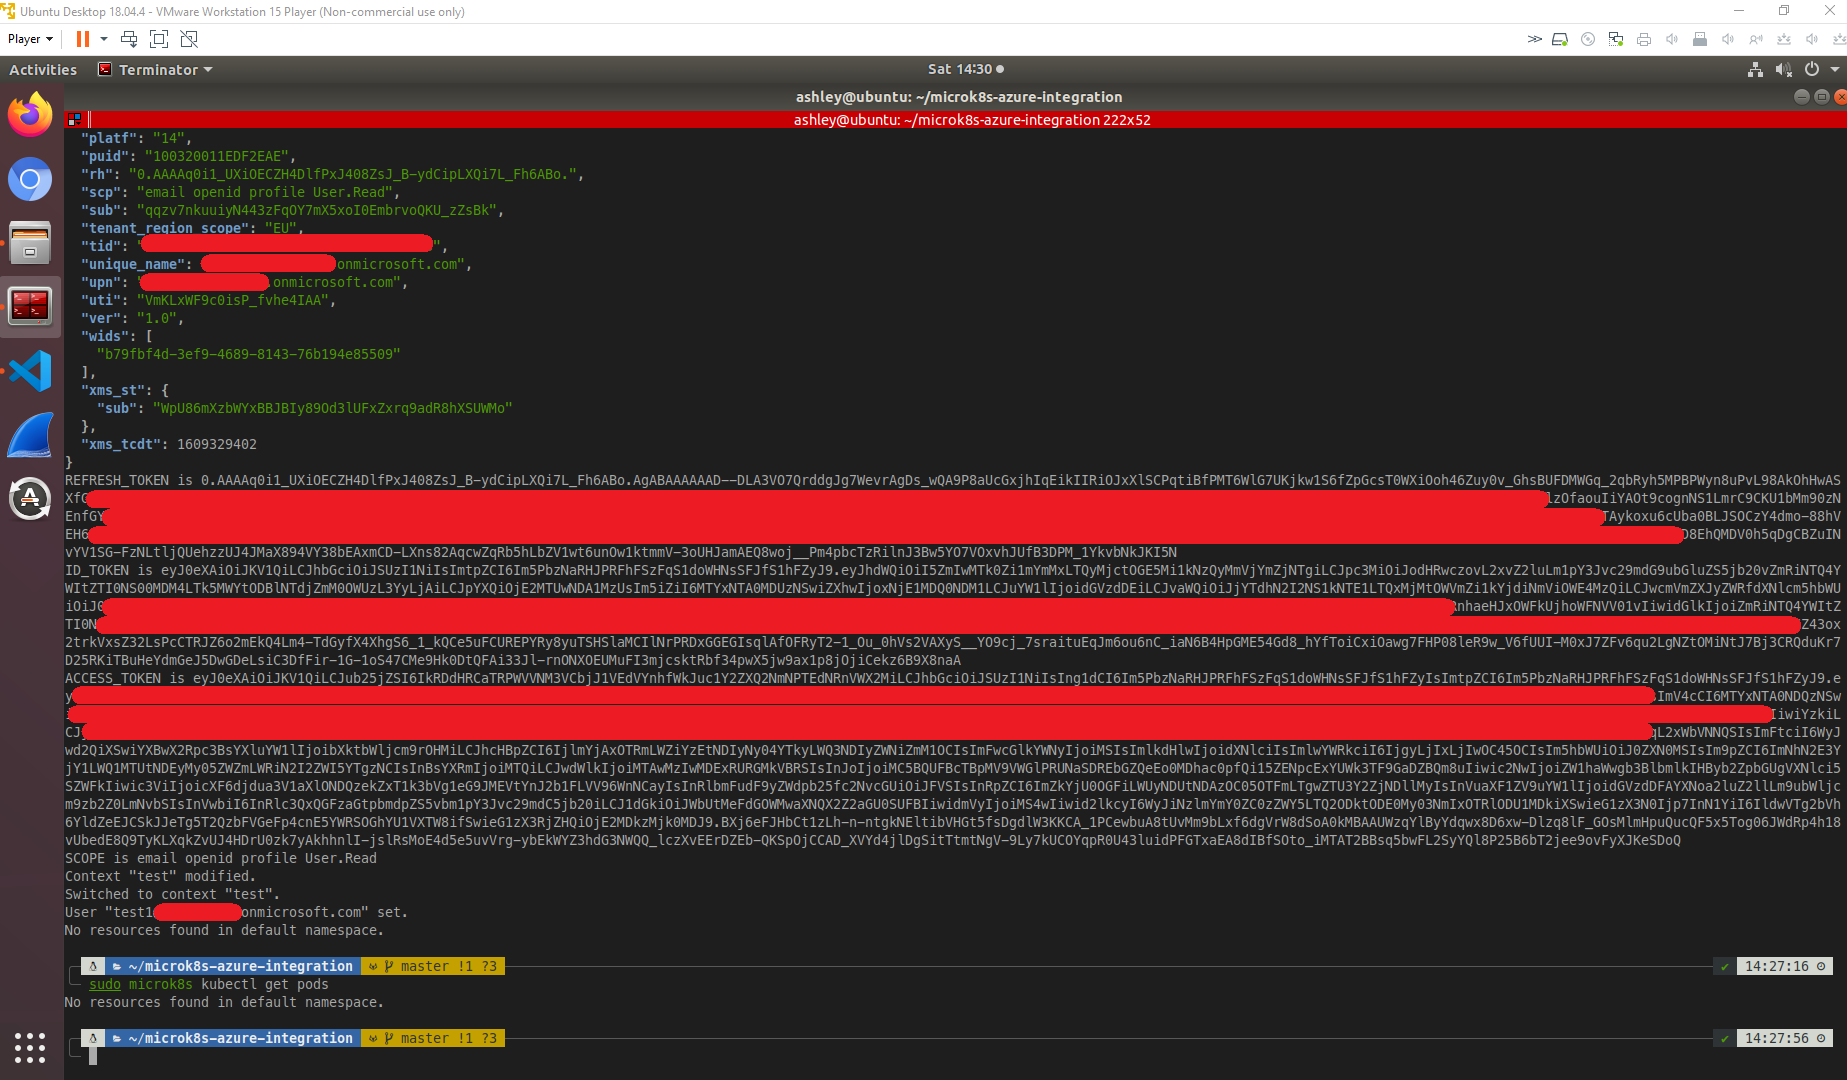
For debugging purposes, you can copy the JWT into an online decoder (https://jwt.ms) and see which attributes are available.
The script will connect to azure and retrieve an ID token, Access Token and Refresh Token. The tokens are then used in a kubeconfig to authenticate to the kubernetes api server.
You can view MicroK8s kubernetes API service logs with the following (ommit -f to not tail live)
1
sudo journalctl -u snap.microk8s.daemon-apiserver -f
Here you can see I am using the script to get a token and successfully using the kubectl command using the new token values after changing context.